“Cloudy yellow headlights are awesome!” said no one ever. Unfortunately, if you live where sunlight can reach the earth, your headlights will fade eventually. Faded headlights can be dangerous since they don’t work as well, and seeing at night is widely considered an essential part of car performance.
Perhaps worse still, you’ll be embarrassed when you pull up to the car meet with sad-looking lamps that scream “old car.” It doesn’t have to be that way, though. Restoring headlights is easy and fast, especially with a kit that includes everything you need. Keep reading to see our favorite headlight restoration kits for 2026.
- Choosing the Right Kit for You
- Top 10 Best Headlight Restoration Kits 2026
- 1. Best Overall Pick: Sylvania 3 Step
- 2. Best Drill-Powered: 3M Headlight Lens Kit
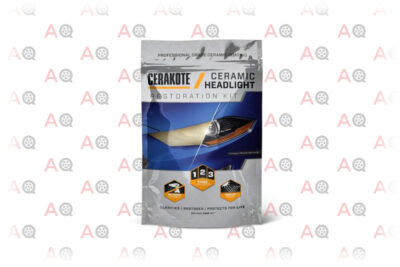
- 3. Best Premium Pick: Cerakote Ceramic Restoration Kit
- 4. Longest Lasting: Meguiar's Heavy Duty
- 5. Best Budget Pick: Turtle Wax Speed Restorer
- 6. Best Applicator: Mother's NuLens
- 7. Most Versatile: Visbella DIY Vehicle Restoration
- 8. Easiest to Use: Rust-Oleum Wipes
- 9. Best For Pros: 3M 025146 System
- 10. Best Drill Sanding Kit: Poliwell Polishing Kit
- Tips, Tricks, and General Info for Restoring Headlights
- Clear Headlights, Clear Peace of Mind
Choosing the Right Kit for You
All the big names in car care offer their own headlight restoration system. Brands you know you can trust, like 3M, Meguiar’s, Turtle Brand, etc. Choosing the right one might be as simple as brand loyalty. If you love Rust-Oleum products, they make a lens restoration wipe that will look great on your shelf between the rest of their products.
We believe it’s a bit more complicated than that, though, and you might want to read through this quick guide. That way, you can get the product that fits your situation best.
How They Work
Headlights are plastic, and they get clouded because the top layer gets damaged by UV and scratches. The best way to clear them up is to sand off that top layer and reveal the beautiful layers beneath.
How most kits differ is in how they sand the top layer off. Some use a variety of polishing compounds, some use varying grits of sandpaper, and some use chemicals to soften the layer so you can wipe it off. Many use a combination of methods. Honestly, it’s not a very important consideration when buying a kit. Let the academics and engineers argue about which way is best. All we care about is results.
Power Tools vs. Elbow Grease
There are two main flavors of headlight restoration kit: the kind that needs power tools and the type that uses calories instead. They both have drawbacks and advantages, but your deciding factor will probably come down to whether you have the power tools to do it. The most common rotary tools for buffing and restoration are: die grinders, orbital sanders, angle grinders, buffers, and drills.
Kits for Power Tool Owners
If you hop down to the 3M kit we recommend, you’ll notice that the pictures on the product page all show a drill. The sanding pad itself has a stick coming out of it meant to be chucked into a drill. That means you can sand and buff a lot more area in a lot less time than you could by hand.
Kits for Everyone Else
Sanding by hand is tedious, but you can actually get better results. That’s why the kit we recommend the most is actually a hand kit and not a power tool kit. Plus, you don’t have to lug out the power tools to use them. You can buy one and just restore the lights in the parking lot of your favorite restaurant while your buddy spends twenty minutes deciding which cheeseburger they want.
The Balance Between Effort and Clarity
Most headlight restoration kits on the market will make your headlights look better. There are very few products that just outright won’t work at all, as one would hope. The degree to which they work varies, though. Some will shine your headlights to the point where they are concourse ready. Some will work just good enough to get you a few extra dollars at trade-in.
Generally, the difference between crystal clear and just ok is the effort it takes to get the result. Some kits, like the Rust-Oleum wipes on our list below, take minimal effort. They won’t make your headlights sparkle or anything, but they are good enough for a daily.
On the flip-side, building your own kit from dry/wet sandpaper and compounds takes a lot of effort, but it is the highest quality result you can get. It’s not really worth it when kits like the Sylvania option exist, but technically it’s true.
What’s in the Box?
One more thing to consider when you buy a kit is, “what comes in the box?” Some kits come with attachments or pads that are reusable, and can be used in other applications. Other kits might not include a compound that you really want. The 3M kit, for instance, doesn’t include a clear-coat, but the one from Meguiars does.
None of the kits we mention are very expensive; few are more than $20. If you buy a really cheap kit that doesn’t include a component you really want, you’ll end up spending more hunting down the individual piece.
If we did our job, now you know what to look for. Now you have to sift through the thousands of competing products on the market, hoping that some guy reviewing it doesn’t just have a vendetta against the company. Just kidding, we compiled the top ten here so you can just pick one and know you’ll be getting a good product.
Top 10 Best Headlight Restoration Kits 2026
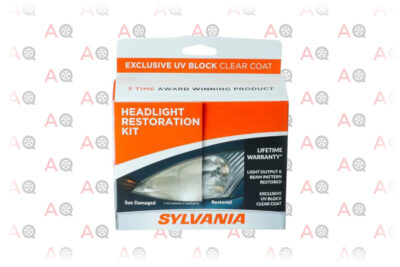
1. Best Overall Pick: Sylvania 3 Step
Editor’s Rating:
What You Get:
- Activator
- Clarifying Compound
- Clear Coat
- Sand Paper
- Cloth Applicators
- Lint Free Cloth
- Vinyl Glover
Is It Easy to Use?
Super easy. All the parts have labels like “step 1” and “step 2.” You don’t need power tools, and the sandpaper pieces included are big enough to last a long time.
Our Review
The best thing about the Sylvania kit is that when you are done, your headlights will look cherry. There are easier kits, kits with more gadgets, and kits that take way less time. None of them will look as good as the Sylvania, and that earns it the top spot.
The kit itself is reasonably complete. It comes with everything you need, including a clear finishing coat that will keep your headlights looking good for years. That’s usually the first thing a company will skimp out on, but it’s essential to apply unless you want to redo all the work after a year.
The only thing you’ll really want to do if you buy this kit is to remember to mask off your paint around the headlight. Maybe you won’t care if you drive a beater, but the same compounds that soften the top plastic layer of your headlights will absolutely soften the top layer of your paint job. Sylvania doesn’t include that in their instructions, so keep it in mind.
What Else Could You Need?
A roll of masking tape could go a long way towards keeping the car clean. The Visbella kit includes masking equipment, and the Sylvania box is definitely big enough to fit a small roll of tape in.
It’s not a deal-breaker. Everyone should have a roll of blue painters tape on hand anyway. It’s easily the second most useful tape in existence behind duck tape.
Pros
- Makes your headlights look amazing
- Doesn't require extra tools to use
- Shine lasts a long time
Cons
- Takes longer than other kits
- The applicator could be bigger
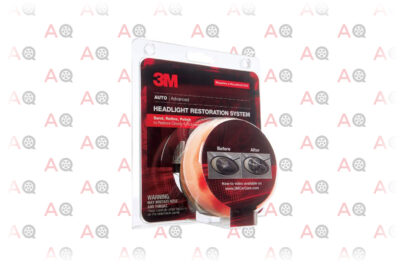
2. Best Drill-Powered: 3M Headlight Lens Kit
Editor’s Rating:
What You Get:
- Pad Holder for Drill
- Sanding Discs for Holder
- Polishing Pad for Holder
- Rubbing Compound
Is It Easy to Use?
The 3M kit is incredibly simple. You chuck the pad holder into a drill, step one. Then you use the holder to wet sand the lenses. Finally, you use the holder with the compound pad to polish the lenses. Done.
Our Review
The 3M kit is probably the best value you can get when it comes to a restoration kit. It barely costs over ten dollars and comes with a pad holder you can use for way more applications than just restoring headlights. You just need a drill. If you don’t have one, though, you can use it as an excuse to go pick one up with the money you’ll save over our premium pick. A harbor freight battery-powered drill will work fine. Avoid their house brand headlight restoration system, though. It’s not great.
Once you chuck the holder into the drill, the entire process will be over before you know it. Use the sandpaper, smear on some polishing compound, and wipe off the haze. It won’t produce the absolute best finish, unlike the Sylvania 3 Step, but you can finish in less than half the time.
What Else Could You Need?
You’ll want two things: masking and a clear coat. Like the Sylvania 3 Step, the 3M kit doesn’t come with any masking. It is easier to avoid getting the 3M compound on your paint. The paste-like 3M stuff is cleaner to work with than the liquid spray in the Sylvania kit. The other thing you’ll want is a clear coat to protect the lenses after you restore them.
The Meguiar’s kit contains both those things, but it costs twice as much. Even if you buy tape and wax, you’ll still save money with the 3M.
Pros
- Fast
- Easy to use
- Produces really good results
Cons
- The kit doesn't include a clear coat
- Requires a drill
Editor’s Rating:
What You Get:
- Oxidation Remover
- Applicator Pad
- Sand Paper
- Ceramic Clear Coat
- Gloves
Is It Easy to Use?
You don’t need a drill, every compound is packaged with its own applicator, and the whole thing comes in a resealable bag instead of a box. That might seem like a dumb thing to point out, until you find yourself with plastic cleaner leaking out of a soggy cardboard box in your back seat.
The individual parts are also clearly labeled based on when you should use them. Honestly, the Cerakote might be the easiest to use kit on our list.
Our Review
We call the Cerakote system “premium.” That’s a lofty way to describe anything that is just a bunch of plastic bags in a bigger plastic bag. This kit, however, earns the title thanks to it’s many intelligent design decisions.
Each individual component is packaged individually and labeled in big, bold lettering. The applicators are color-coded, and the instructions are printed on the packaging in multiple locations. We call the Cerakote premium because of the collection of little things that it excels at.
It also includes a ceramic clear coating. For those of you who don’t know, ceramic clear coats are all the rage nowadays. They are tougher and more durable than your standard wax finishes, and they protect against UV really well. That means once you finish with the easy process of cleaning your headlamps using this kit, you can rest easy knowing that your lights will stay looking great for a long time.
That comes at a price. The alternative from Turtle Wax also includes ceramic protection but comes in at half the price. Meguiar’s offers their own proprietary clear coat, and you can use the applicators repeatedly. You will only find the combination of amazing clear coat and ease of use in the Cerakote kit, though.
What Else Could You Need?
The Cerakote doesn’t include anything to help with cleanup, so make sure you have a bottle of Windex and some paper towels on hand. Also, like almost everything else, it doesn’t come with masking, so grab some blue tape.
Pros
- Very easy to use
- Ceramic clear coat is really durable
- Instructions are really easy to follow
Cons
- More expensive than other kits
- Headlights won't be as clear as the less expensive Sylvania
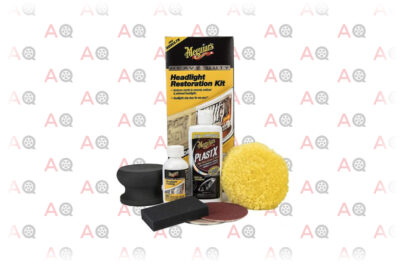
4. Longest Lasting: Meguiar's Heavy Duty
Editor’s Rating:
What You Get:
- Plastic Cleaner and Polish
- Applicator Pad
- Wool Pad
- Sanding Disks
- Easy Grip Sanding Pad
Is It Easy to Use?
If we are completely honest, it’s not the easiest to use. The instructions tell you to use a drill, but they also include a hand applicator. The steps aren’t labeled, and you have to sand for a long time because they don’t include lower grits. The kit is more for a hardcore, break out the clay bar on the weekend type person who has a lot of experience detailing and polishing.
Our Review
Meguiar’s is a household name in the car detailing world, and they have to work hard to keep their high reputation. It shows in this kit. First, it works great. There’s no arguing that. Second, the applicators and pads are of high quality. You’ll be able to keep them around and use them for other projects.
The downside to the Meguire’s is that the company seems to know that the person most likely to buy their product is already familiar with using their other products, which is a roundabout way to say that it’s not very beginner-friendly. Their instructions, for instance, could definitely be better.
If you are looking for an easier to use, high-quality kit, get the Cerakote package. If you want something more dedicated to power tools, Mother’s has you covered here.
If needing to do a bit more work doesn’t scare you, though, you are getting really high-quality products when you buy this kit.
What Else Could You Need?
We are becoming a broken record, but you’ll want to go get some masking tape. It’s frustrating because it’s such a small thing, but only Visabella seems to think you want to protect the paint on your car.
The other thing you might want is a drill. You don’t need one; the kit comes with a hand applicator pad. However, the instructions indicate that it makes life easier if you have one. It totally does, so it’s not bad advice. It’s up to you whether you want to spend money or time.
Pros
- High-quality components
- Includes clear coat
- The result is very good
Cons
- It's a little complicated
- More expensive than other kits
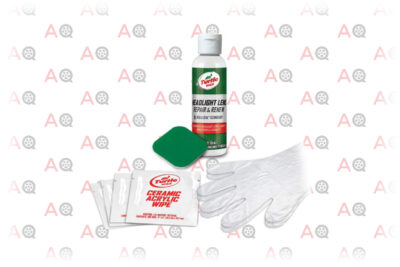
5. Best Budget Pick: Turtle Wax Speed Restorer
Editor’s Rating:
What You Get:
- Bottle of Repair and Renew
- Applicator Pad
- Ceramic Wipes
- Gloves
Is It Easy to Use?
There are only two steps, so there’s nothing to complain about. It takes longer than other kits because it doesn’t have multiple grits of sandpaper to work through, so that’s a mark against it.
Our Review
Turtle Wax is another one of those household names, but unlike the other big names on our lists, the Turtle brand doesn’t feel the need to charge you for their logo. This is the cheapest system on our list. The only way to get a less expensive kit is to source every part out individually.
The price forgives a lot of the issues with the Turtle Wax kit. The applicator isn’t big enough, the instructions aren’t amazing, and it takes a long time to get a decent shine. You do get a ceramic coating, though, so there’s that.
At the end of the day, if you are just looking for a kit to shine up your car on a budget, the Turtle Wax kit fits the bill. Get the more expensive Sylvania 3 Step if you want a really clear lens, or the Cerakote if you really love the ceramic coating.
What Else Could You Need?
If you run out and grab a bigger applicator, you’ll be happier. They don’t cost very much, and it can save your hands from cramping.
Pros
- Inexpensive
- Ceramic coating is very durable
- One step compound is very convenient
Cons
- Takes a while to get a good polish
- Even if you spend forever polishing, it won't be as good as other kits
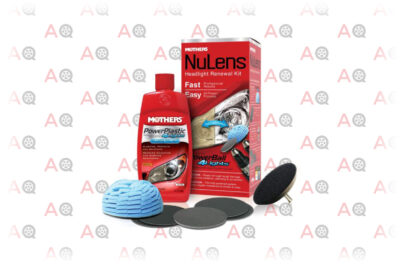
6. Best Applicator: Mother's NuLens
Editor’s Rating:
What You Get:
- PowerBall Polishing Tool
- PowerPlatic Liquid Polish
- Backing Plate
- Restoration Disc
Is It Easy to Use?
The Mother’s kit is simple; there’s not much to do, which makes it really fast and easy to understand. What makes it a bit hard to use is the actual process of applying the finish. It takes practice to get a feel for using a polishing ball.
Our Review
People will fight forever over the merits of Mother’s vs. Meguiar’ s anywhere detailing enthusiasts gather. We don’t want to cause an argument, so we’ll keep it simple. If you want to do more work by hand, and pay more attention to detail, the Meguiar’s is your choice. If you want to work faster and use power tools, though, Mother’s has your back.
The kit includes a ball applicator, which is something everyone should just have anyway. If you own a drill or similar rotary tool, get one. Unlike flat applicators, a ball applicator can get into corners and over curved surfaces. Since most headlights are pretty curvy, you can see why that’s a good thing.
What does annoy us about the Mother’s kit is that it doesn’t have anything extra. It’s a higher-priced kit. It should come with cleaner, sandpaper, and a clear coat, but it doesn’t. You just get a big bottle of wax. The wax is excellent, don’t get us wrong. We just wish it also had a clear coat.
What Else Could You Need?
The Mother’s compound is not a hardcore polishing compound, which means it’s much safer for paint. That means we can’t really chastise them for not including masking. Instead, you have to buy a clear coat, which makes this kit the same as the 3M at nearly twice the price. It’s hard to overstate how useful that ball applicator is, though. That probably makes it worth it.
Pros
- Comes with a cool applicator
- Comes with enough polish for four or more headlights
- Very fast
Cons
- No clear coat
- Won't fix deep scratches
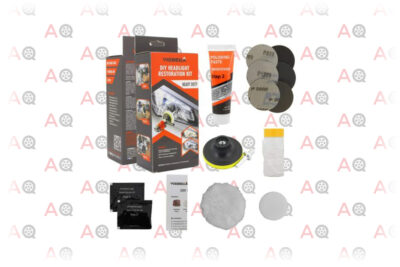
7. Most Versatile: Visbella DIY Vehicle Restoration
Editor’s Rating:
What You Get:
- Masking Tape
- Wool Applicator
- Drill/Grinder Attachment
- Sanding Discs
- Hand Applicator Pad
- Polishing Paste
- UV Protective Clear Coat
Is It Easy to Use?
It’s ok. The Visbella kit has a lot of components, which makes it a little intimidating to just jump into. Even the drill attachment is two parts so that it can also work on an angle grinder. Also, the instructions are just ok. They are on a little piece of paper with some fine print on it. Trust us when we say that it’s really annoying when the instructions blow away.
Our Review
First things first, this is the only kit that includes its own masking. Congratulations to them, we won’t have to whine about it in the “what else” section. In fact, we don’t have anything to whine about in that section. The Visbella is a really complete kit.
That doesn’t mean we don’t have anything to whine about, though. Visbella’s biggest flaw is also its biggest asset: it’s comprehensive. You need a drill, you need a lot of patience, and you need to set aside a lot of time to make sure you get to know each step of the process.
The reward for all that work isn’t the best finish on the list. It’s outclassed by the faster 3M kit. All added up, though, it’s cheaper than the 3M kit because it includes a clear coat, so you have to choose which sacrifice you want to make.
What Else Could You Need?
We don’t know. Whatever you want to drink while the wax sets? Maybe some paper towels to clean up if you accidentally spill some stuff on the drill? You don’t really need anything else.
Pros
- It's a very complete kit
- The applicator is adaptable for numerous tools
- The kit can also be used to fix the clear coat on your car
Cons
- Complicated
- Leaves some scratches behind
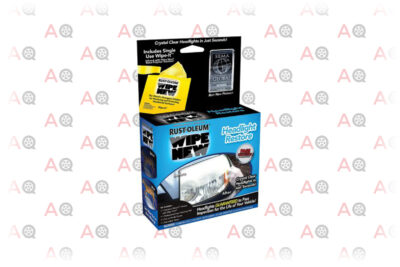
8. Easiest to Use: Rust-Oleum Wipes
Editor’s Rating:
What You Get:
- Wipes
- Polishing Pad
- Gloves
- Microfiber Towel
Is It Easy to Use?
Yes, it’s effortless to use. Like most kits, you start with cleaning and sanding. Unlike most kits, the final step is just to wipe it down with a special wipe. It doesn’t get much easier than that. The only frustrating part is that unlike the other wipe based kit from Cerakote, you only get one applicator that you have to use on both headlights.
Our Review
In the quick guide, we talked about how effort is directly tied to quality. The Rust-Oleum was what we had in mind when we said that, it’s the epitome of low effort, ok quality. Yes, it will clean your headlights, as long as the scratches aren’t too deep. Just about everything else will clean them better, though.
The speed and convenience is the selling point, though. If you have a beater or a daily that just needs a quick spruce up, you probably don’t care too much about making the lenses perfect. If that describes you, the Rust-Oleum wipes will work great.
There’s not much else to say, honestly. Yes, they work, no, they aren’t the best, but they are very cheap and easy to use.
What Else Could You Need?
Cleaner and sandpaper, if your yellowing is really bad. The Rust-Oleum wipes are really only for shallow surface issues, if you have serious discoloration, you’ll need to buy your own cleaners and sandpapers. Or just buy a kit like the Sylvania 3 Step that includes all that stuff.
Pros
- Inexpensive
- Very easy to use
- Fast
Cons
- Not good for deep imperfections
- Doesn't polish as good as similar products
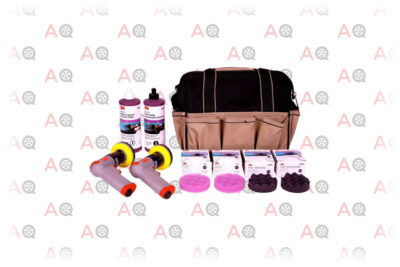
9. Best For Pros: 3M 025146 System
Editor’s Rating:
What You Get:
- Powered Sanding Tool
- Powered Polishing Tool
- Plastic Cleaner
- Polish
- Sanding Discs
- Soft Applicators
- Adapters
- Sand Paper Holders
Is It Easy to Use?
No. These are tools for someone that is taking headlight restoration really, really seriously. There’s no instructions or color-coded pads, just some bottles and some buffers. The other 3M product on our list has big, full-color instructions and is very simple to use. If you need that, go grab that one.
Our Review
Do you plan on restoring more than ten headlights a year? No? Then save your sanity and turn away. Get the Sylvania kit, you’ll be happy with the results, we promise. Are you willing to drop nearly $500 when everything else costs less than $30? No? Then save your sanity and piece together your own kit.
If you are still here, then take a look. This kit is fantastic. We called the Visbella kit complete, but it’s got nothing on 3M. The Visbella requires you to have a drill, the 3M system includes two. Actually, they are not really drills. They are air-powered random orbitals, and some of the best small buffers on the market. It’s not even about headlights. If you do a lot of polishing and sanding, this kit is excellent.
You just really need to know what you are getting into with this system.
What Else Could You Need?
You need an air compressor, for one. With the compressor, you need hoses, fittings, and a water trap. You should probably also have an entire shop to work in, because the only way to justify the price is if you are going to use these sanders constantly.
You also need masking supplies. If you have a shop, you have those, but this section feels empty if we don’t point it out.
Pros
- Includes two high-quality DA buffers
- 3M polishing compounds work great
- Polishing a headlight takes minutes
Cons
- Really, really expensive
- You need an air compressor
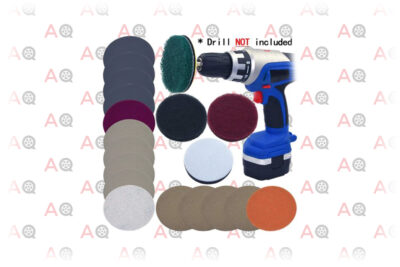
10. Best Drill Sanding Kit: Poliwell Polishing Kit
Editor’s Rating:
What You Get:
- Drill Adapter
- A Bunch of Sanding and Polishing pads
Is It Easy to Use?
No, it’s not. First of all, you have to go buy your own polishing compounds and clear coats. Second, using a drill to sand is very fast, but it does take a lot of practice to get it perfect.
Our Review
We included this product on our list of car headlight restoration kits for the people that like using their own polishes and cleaners. If you are the type of person that would love to see if toothpaste makes a great plastic cleaner, this is the kit for you.
The Poliwell doesn’t include any chemicals, it’s just a bunch of abrasive pads that attach to a drill. That makes it a lot more useful than many kits just because you can use it for a lot of things that are not headlights. Want to buff your toaster? Boom, you have the kit to do it.
The downside is that after you try all the wacky internet suggestions like Weed Killer and WD40, you are just going to wish you had just bought the 3M kit. At least you’ll have the pads to do other things with.
What Else Could You Need?
Polishing compound, cleaning compound, clear coat, and masking. In fact, you are going to just need everything that’s not a buffing pad.
Pros
- Versatile
- Drill pad attachment works great
Cons
- Despite being marketed for headlights, it doesn't actually include any headlight specific products
- It has a high learning curve
Tips, Tricks, and General Info for Restoring Headlights
Once you have chosen a headlight restoration kit, you are ready to dive into using them. We want to help you get the most out of your product so that we don’t look like big phonies, so we compiled this list of tips, tricks, and general information to help. Just to be clear, though, nothing we say is more important than the kit’s instructions.
Read the Instructions
We said it before, but it needs to be repeated. Every kit is different. Every manufacturer has their own interpretation of the exact process that they designed the kit around. They are the ones that know how to get the best results.
Your pride as a DIYer will not suffer nearly as much as your pride in your car if you end up with a swirly, scratched mess of a front end. RTFM. Consult Manuella. Watch the video if there’s a video. Do it.
Keep Everything Clean
Cleanliness is always important, and when it comes to headlight restoration, there are two main categories.
Masking
We complain about how no kit other than the one from Visbella comes with masking materials, and that’s because you should mask off your headlights before attempting to restore them. The chemicals used to soften and polish the lenses can be damaging to paint.
If you get a little aggressive with your sanding, you don’t want to be sanding off-color. It takes a few minutes to run the tape around the outside and protect things. Bonus point, you won’t have to wipe off the extra goop that gets flung everywhere, just peel off the masking and go.
Clean the Lenses
Some kits include cleaners. Most don’t. The fantastic 3M kit doesn’t include a cleaner. They just low-key mention it on the box that you should clean the lights first, so don’t rely on anyone to remind you. If you go straight into polishing and there are big chunks of debris stuck to your lens, you will be putting deep scratches into the plastic.
Spray some Windex on the lens, wait a moment, then wipe it off. Wipe it off in one direction, and switch to a clean part of the rag every time you complete one pass. That’s just a pro-tip for car cleaning in general, free of charge because we like you. Once it dries completely, then start the restoration process.
Practice Using Power Tools Before Starting
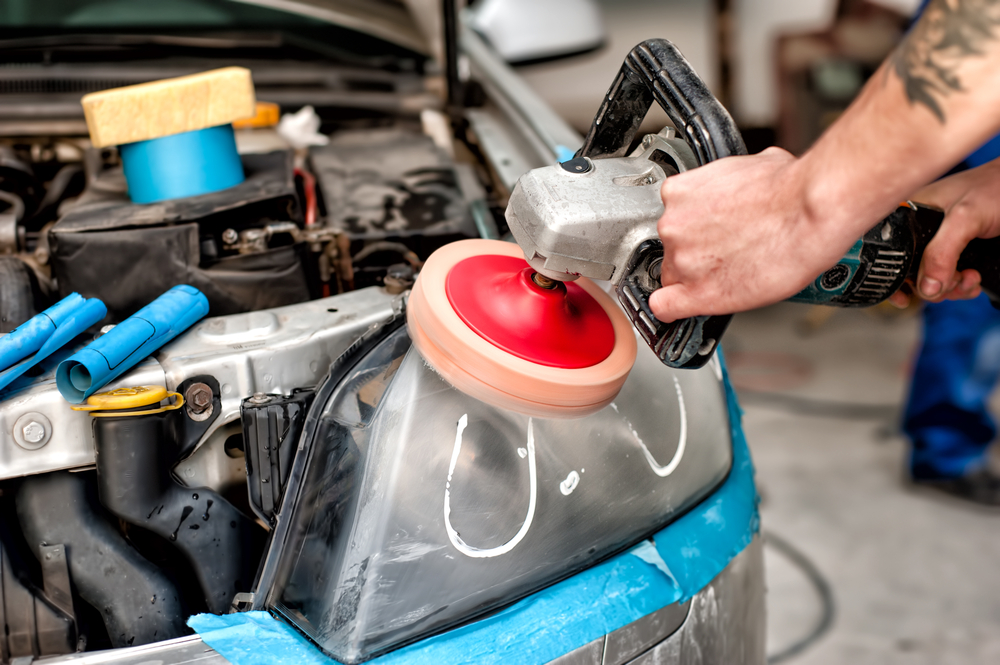
Units like the smaller 3M kit we recommend are built to be used with drills or other power tools. The 3M total system even comes with its own. The thing is, those tools can be a bit tricky to get the hang of. Drills, especially, want to “walk” around when you try to sand with them. You have a lot of leverage because of the length of the tool, and it can be tough to keep the sanding or buffing disc flat.
There’s no shame in practicing on garbage before risking putting deep scratches into your headlight. That’s one of the advantages of the ball style polisher the Mother’s kit comes with. With the ball style, it doesn’t matter if you are perfectly flat or not, it has enough give to conform to the contours.
Do You Really Need a Kit?
No, you don’t. You can just get a handful of dry/wet sandpaper and some wax and have at. ChrisFix, a semi-famous youtube car DIYer, thinks it’s the best way to do it.
The problem with the DIY method is that there are no instructions. There are not convenient labeled bottles or useful applicators. Also, the price of failure is high. Most kits come with soft applicators and the right rubbing compounds to ensure you get a good result.
If you jump into the DIY world with the wrong kind of sandpaper, you can permanently destroy your headlight lens. That means you are risking a $200 part to save like $5. There’s just no reason to.
Remember, restoration kits aren’t the only way you can improve the look of your headlights, especially If you’re willing to invest. Upgrading to LED headlights or a full HID headlight kit can have a much more dramatic effect than a restoration.
Why Do Lenses Get Foggy Anyway?
There are a few reasons, actually. The simplest reason is that dust and other abrasives in the air constantly scratch up the outer layer of your headlights. The biggest reason is that UV light from the sun causes oxidation. Oxidation is also what turns iron to rust, it’s a destructive process that breaks down the plastic lens and messes up your shine.
If you want tips on preventing foggy headlight syndrome or want to know more about some other headlight problems, the Glass Doctor has an excellent write-up here. Just ignore the part about using toothpaste. Just like with other DIY solutions, it’s not worth it to use $5 of toothpaste and potentially scratchy cloth when you could just spend $9 on the Turtle Wax kit.
Clear Headlights, Clear Peace of Mind
“Those headlamps look great!” is something you will definitely love to hear after restoring them. No more dangerous night driving, and it’s amazing how much clear lenses pop. It’s good for you, it’s good to have clean, great-looking parts on your car. If nothing else, it will improve resale value, there’s just nothing to complain about. Grab a kit and get buffing.