There are not many things in the automotive world that are named as aptly as the engine mounts. What do they do? They hold your engine to the car. You mount your engine to the chassis using the mounts. We wish everything was so straightforward.
Unfortunately, engine mounts can fail and ruin your day. In this article, we’re going to look at the issues caused by failing engine mounts. We’ll talk about what they are and what your replacement options are, and finally give you some steps to follow if you want to replace the mounts yourself.
Symptoms of Bad or Failing Engine Mounts
Most of the symptoms of a bad mount have to do with how the car feels while you drive it, so your feet and hands are your best diagnostic tools. The car will feel a little wrong. It will feel like there are disconnected parts, and you’ll feel less confident when you accelerate. The car may hesitate a little bit, and the steering wheel may jerk around.
There are some other symptoms that you can be on the lookout for, too. If you prefer visual references, this video on YouTube does a great job showing what happens when a mount has gone bad. Those severe engine movements are harmful to the motor.
Symptom summary:
- You hear clunking and banging when you accelerate or brake
- The car vibrates a lot when idling
- You notice the engine move excessively when the hood is open
Are Bad Engine Mounts Dangerous?
A bad engine mount or engine mounts probably won’t ruin your car immediately. Most engine mounts are designed in such a way that even if they fail completely, your engine can’t free itself or anything like that.
However, over time, the broken mounts can cause other engine damage. The violent shaking and rattling can cause fragile parts to break and can weaken metal parts over time. That includes metal parts attached to the transmission, which can be very expensive if they break.
Performance
In addition to being annoying and potentially engine damaging, bad engine mounts will rob you of performance. If your engine is wasting energy twisting around, it isn’t putting as much energy as it can into driving the wheels.
We’ll go over it in a moment, but one of the biggest reasons to replace engine mounts, even before they go bad, is to upgrade them to a harder compound that absorbs less energy. That gives more energy to the tires and improves the feedback to the steering wheel.
You sacrifice some comfort since more vibration is going into your wrists, but that’s worth it to people who want as much power as possible.
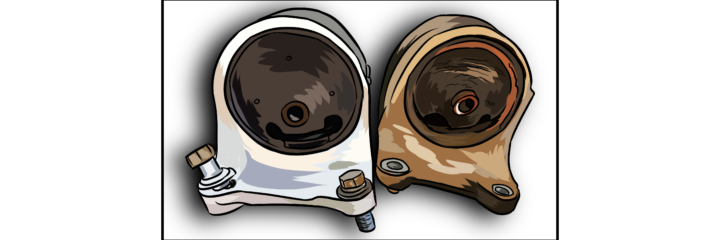
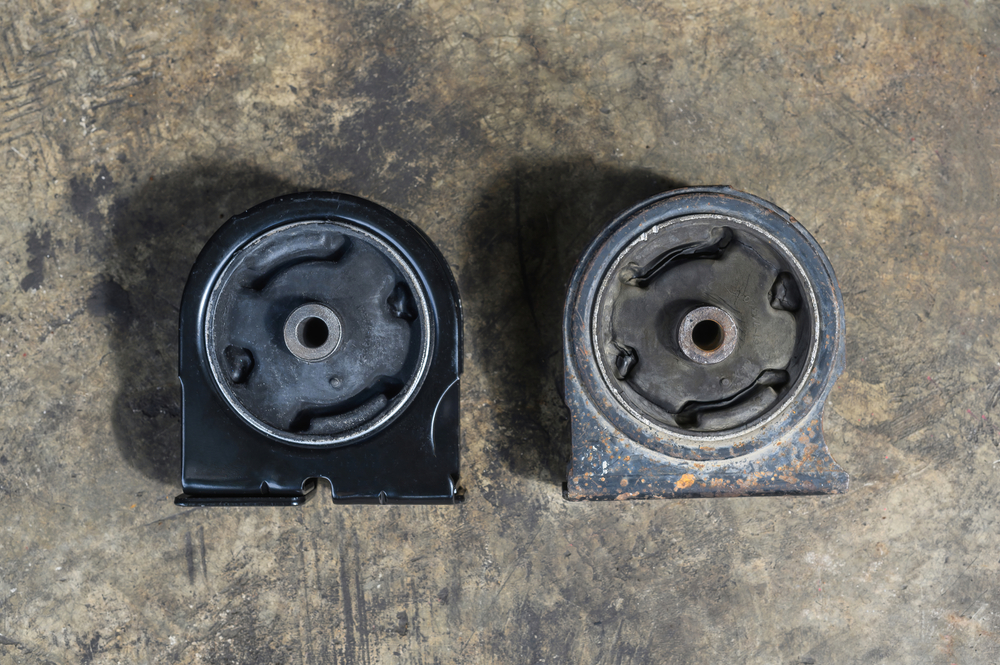
All About Engine Mounts
Engine mounts are fairly simple. Usually, they consist of a couple of brackets, a big bolt, and a bushing. The bushing is what gives the engine mount its properties and what differentiates different levels of engine mount.
Think of the bushing as a little suspension component for your engine. They squish and absorb some engine movement so that you are more comfortable inside the cabin. When they begin to wear out or get destroyed, the engine can move a lot more than it’s supposed to.
The following types of engine mount are the ones you are most likely to come across. If you are replacing your engine mounts, you may have a choice of materials depending on your car.
Rubber Mounts
Rubber is fairly squishy and is the most comfortable way to mount an engine since it will absorb a lot of the vibrations. The downside is that you will lose a little bit of performance since the mounts will absorb some energy meant for the wheels.
Polyurethane Mounts
Polyurethane mounts are much harder than rubber mounts, but they still have a little bit of play. They are a good compromise between comfort and performance and can regularly be found on modified cars.
Solid Mounts
Solid mounts, sometimes called metal or rigid mounts, are simply chunks of metal that bolt the engine directly to the chassis. Without a bushing to absorb vibrations, the power will be transferred as efficiently as possible to the drive wheels. You’ll find solid mounts in race cars and other purpose-built vehicles.
The downside is that you can harm the motor. Some play is beneficial for safety and not just comfort. Imagine bending a dry stick vs. bending a small branch that’s still on the tree. The dry twig has no flexibility, and it will break if you stress it.
Hydraulic Mounts
Hydraulic mounts are usually only found on luxury vehicles because they are very expensive compared to other mounts. Instead of a hard bushing, hydraulic mounts function more like a water balloon. They have a rubber bladder filled with fluid that can absorb vibrations easily but is fairly hard to compress, so the power loss is minimal.
The biggest downside to hydraulic mounts is that they can leak. Even a small leak will cause these mounts to fail, and it can be very messy to clean up on top of that.
Electric Mounts
Electric mounts are probably the rarest mount you will encounter. Electric mounts use controllers to constantly adjust the hardness of the mount. They can do really advanced things like actively pushing against shake for comfort, locking down when accelerating, and sending information to the PCM for diagnostic purposes.
They are really expensive, though, and very complicated. That means there are many parts that can fail, and when they do, it’s not a simple replacement like it is with other types.
How to Replace an Engine Mount
If you have all the symptoms of a bad engine mount or just want to improve your acceleration, there are a handful of steps to take to replace your mounts. It’s something that most people can do; however, there are some specialized tools you need to own.
- A floor jack, cherry picker, or other way to lift the motor
- A variety of hand tools
- A large pry bar
- Different sized hammers and punches
- Universal and extensions for a socket wrench
- A container to store and label the bolts.
You can watch the entire process on this video where the host replaces the mounts on an older Miata.
Removal Steps
There are thousands of different vehicle designs, and no two are the same. So your specific process can vary wildly. Still, this step-by-step removal guide can get you headed in the right direction and at least let you know what you are in for.
- Lift and support the car so that you can work underneath it. Never crawl under a car that isn’t supported on stands. Don’t do it. The car weighs a lot more than your bones can support, so don’t be that person.
- Remove the front wheels along with anything else that’s in the way. On some FWD cars, you may need to loosen and swing suspension components out of the way, and on some cars, there might be inner fenders or mudguards blocking access.
- Clean the old mounts and the areas around them. It’s simply good practice to keep the surrounding area as clean as possible. It can be difficult to see what’s going on if everything is covered in grime.
- Support the engine independently of the vehicle. The easiest way to do that is with a floor jack. Just make sure you protect the parts under the motor and lift a spot that can support the weight of the motor.
- Check for any components that will prevent the engine from being lifted. You may need to loosen the exhaust system on some cars. Also, keep an eye out for wires or vacuum lines that can pinch and break.
- Lift the motor until it puts a little bit of pressure on the motor mounts. Your goal is to lift the motor a bit without lifting the car off the jack stands.
- Remove the motor mount bolts. Make sure to label them. It can be helpful to put them in individual containers with diagrams drawn on the containers. You will want to put the bolts back in the same spot.
- Lift the motor a little more to take all of the pressure off the mounts.
- Remove the mounts. This can be something that is very easy, and you will simply be able to reach up and pull the mounts out. It can also be very difficult, and you will need to use a hammer and/or punch to drift the mounts out.
- Slide the new mounts in. Using a little bit of grease on the flat surfaces can help you get the new mounts in.
- Put the bolts back and snug them up. Don’t tighten them until all the bolts are in. Sometimes, if you tighten one side, the holes won’t align on the other side. By setting all the bolts first, you can avoid that fate.
- Torque down the bolts to the correct torque specs.
- Put the rest of the parts back and take the car off the supports. You’ll be good to go.
Paying a Mechanic Instead
If you don’t have a way to support the motor, or you don’t have the space to do the work yourself, you can take the car to a mechanic instead. You’ll want to call the shop before you take your car in so they can have the parts ordered ahead of time.
Expect to spend between $400 and $700 depending on what kind of shop you take your car to. The engine mounts themselves will be $100-$200, and you can expect the mechanic to need 2-3 hours to do the job.
No More Shaking
If you’re shaking a martini, you might be serving a secret agent. If you are shaking a motor, you might be in for expensive repairs. Don’t let your motor shake; let this article inspire you to replace bad motor mounts and get back on the road in comfort.