
Modern drivers use a lot of electricity. We plug in our cellphones, run giant amps, and have more lights than a football stadium. When those things don’t get the juice they need, they don’t work. When they don’t work, we have a bad day.
Well, let’s make sure that doesn’t happen. In this article, we’ll talk about the voltage regulator, a vital part of your car’s electrical system that is responsible for making sure everything gets the power it needs. First, we’ll tell you what to look for if you suspect yours is going bad. We’ll follow up with what it is and how it works and teach you how to test it. Finally, we’ll finish with how you can solve any issue that might arise.
Symptoms of a Bad Voltage Regulator
Most of the systems in your vehicle require between twelve and fourteen volts. It’s not really an exact science; the alternator and battery can fluctuate outputs depending on the temperature, humidity, condition of the wires, and other environmental factors. Minor fluctuations are ok, it’s when the voltage gets really high or really low that things get bad.
The following symptoms are symptoms of a faulty voltage regulator.
- The headlights periodically dim or flicker
- Sometimes the car takes a long time to start or sounds very weak while starting
- There’s a lot of corrosion around the battery terminals
- The battery gets low frequently
- The voltage gauge is erratic
- High-beams don’t work
Voltage Issues
Almost everything in your car needs electricity to function correctly. That means that anytime something doesn’t work, it might be an issue with the electrical system. For instance, if you have power windows rolling down really slowly or have a digital dash that gets dim after 10 minutes, you are probably experiencing voltage issues.
The way you can tell that your voltage regulator is failing and not a single component is that a failing voltage regulator will supply the incorrect voltage to everything. It won’t just be that your headlights are dim; it will be that your headlights are dim, your power seats stutter when moved, and your phone won’t charge even though it’s plugged into a high-speed 12v charger.
What a Voltage Regulator Does
The voltage regulator is a part of the alternator. To understand what the regulator does and why it’s necessary, let’s first make sure we know what an alternator is and how it works.
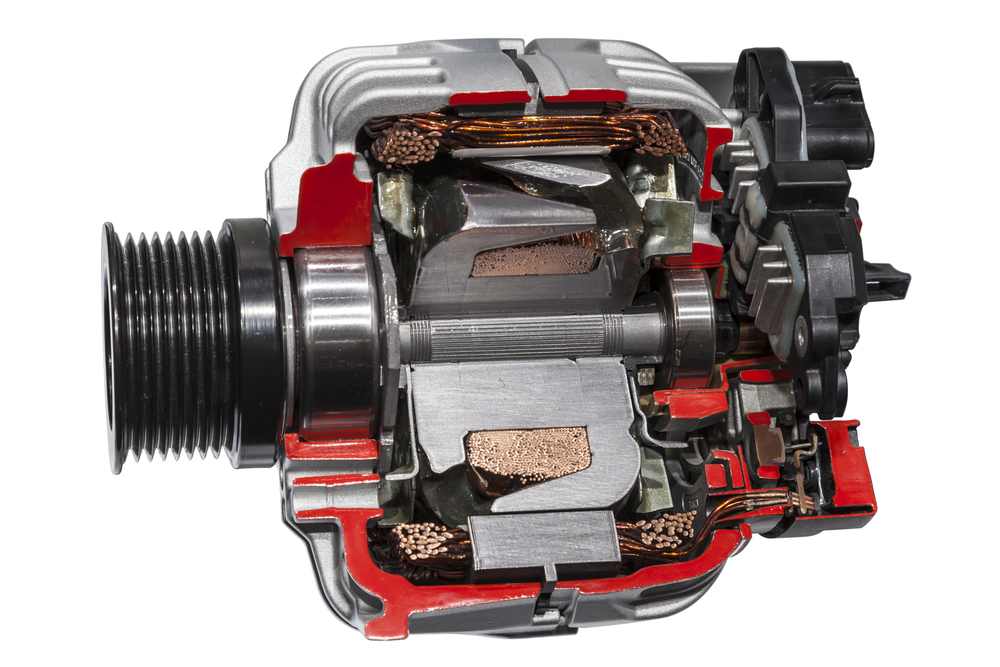
The Alternator
If you add up all the electrical loads you need for your car, it will come up to about 50 amps. That’s only for the necessary stuff; if you add a single large amplifier, you can easily exceed 100 amps, so we won’t go there right now. That means a 40ah battery, which is pretty common, won’t even last one hour on its own. If you add in having to actually start the car, you might get 20 minutes of juice.
That’s where the alternator comes in. The alternator is a metal cylinder with a pulley on the front. That pulley is driven off the serpentine belt from the motor, and as the alternator spins, it generates electricity. In fact, when your car is running, the alternator is generating all the electricity that your car is using. It even generates enough to power a monoblock and subwoofer so that you can rock out.
Unregulated Voltage
The alternator can produce a lot of power that can fluctuate wildly. When your car is idle, it’s not turning the alternator very fast, so it’s not producing a ton of power. When you step on the gas, the engine and alternator turn much faster and generate a lot more power. If you simply let all this power into your electrical system, all your fuses would blow up, and you’d have a lot of broken circuits.
To keep the voltage levels even and usable, modern alternators come equipped with a voltage regulator. That way, instead of producing 10v at idle and 200v at wide-open throttle, the alternator produces about 13.8-14.4v all the time.
Testing a Voltage Regulator
As we said above, an alternator should be producing between 13.8 and 14.4 volts. You will need a multimeter to test the alternator and make sure it’s producing the correct voltage.
If you don’t have one, we suggest this one from Amazon. It’s an entry-level diagnostic tool. Later on, if you get more serious about testing electrical systems, you’ll want to buy one with an amperage clamp from a more reputable company like Ideal or Fluke.
Using a Multimeter
If you want a full breakdown of everything your multimeter can do, click this link. To test a voltage regulator, though, you only need how to test DC voltage. Here’s how to set that up.
- Turn the dial to DC voltage
- If you don’t have auto-range, set the range to whichever range is as close to 12 without being under.
- Test a component you know is working, like a 9v battery.
That’s all there is to it.
Testing the Alternator
- Connect the red multimeter lead to the positive battery terminal and the black multimeter lead to the negative terminal. You can do this with alligator clamps or by poking the end of the lead into a secure spot.
- Read the battery voltage. It should be more than 12v. If it’s under 12v, you need to replace your battery before continuing. It may be your entire problem.
- Place the multimeter in a safe spot where it can’t fall into belts or fans.
- If you have a friend that can help, have them start the car. If not, start the car yourself.
- Read the voltage displayed on the multimeter. It should be 13.8 volts, or at least close to it.
- If it doesn’t read higher than the battery voltage, your alternator may be bad.
- This is where having a friend can really help. You need to rev the engine a bit and watch the voltage. If you have long leads, you may be able to take the multimeter into the cab with you. If you have an older vehicle, you may be able to open the throttle by pulling on the throttle cable on top of the motor.
- When the motor is revving to about 4k or so, the voltage shouldn’t be higher than 14.5v. If you see 14.8 or 15, your voltage regulator is bad.
Fixing the Issue
Replacing a voltage regulator is a moderately involved process. You will need at least a set of basic hand tools, and you may need a few specialty tools like a breaker bar or a torque wrench.
If you don’t have the tools or space to replace a regulator yourself, or you prefer to let a shop do it, most mechanics are more than capable of performing the operation.
Doing It Yourself
There are two parts to replacing a voltage regulator.
Removing the Alternator
Step 1: Disconnect the negative battery cable from the battery
Step 2: Unplug the alternator. Some alternators use nuts to hold the charging cable on. Be careful not to lose those nuts.
Step 3: Remove the serpentine belt. This webpage has a good overview of the serpentine belt inspection and removal with pictures. Just note that you don’t need a special tool to move the tensioner pulley; a stout socket wrench or breaker bar will work fine.
Step 4: Remove the bolts holding the alternator in. This can get tricky on some motors because there may be guides or heat shields in the way. There may also be other components that are held in with the same bolts that hold the alternator in.
The best way to keep track of things is to snap a couple pictures of the assembly before starting and keep every part you take off in a single container, so they don’t get confused with other parts. While the parts are off, it’s a good idea to clean them up a bit. Water with a little dish detergent works great; just be sure to dry them off quickly to avoid rust.
Step 5: Carefully lift the alternator out. They can be deceptively heavy; even the small alternator on a Toyota Corolla is 15lbs. Once it is removed from its mount, set it on a piece of cardboard or a rag to protect the surface. Do not set the alternator on the pulley. Lay it on it’s side, or place it with the pulley up.
Step 6: Clean the alternator. It’s an easy step to take with the alternator out of the car, and you will be able to see if other problems need addressing. Use an electrical contact cleaner to scrape off any corrosion where the battery connects to the alternator, and wipe down the outside with a degreaser.
Removing the Regulator From the Alternator
Once the alternator is removed from the car, the voltage regulator’s actual removal is pretty straightforward.
Step 1: Put on some safety glasses. You can avoid this step, and most people do, but we will always strive to teach people the correct way to do things. There are big springs inside the alternator attached to chunks of metal called brushes. They can pop out and get lodged in your eye. It’s very unlikely, but you only have two eyes. How much risk do you really want to take?
Step 2 A: Locate the voltage regulator. You may need the help of a manual or the internet to do this quickly, or it may be the only component attached to your alternator. Every manufacturer has a different way of doing things.
If you have a voltage regulator that is simply mounted to the case of the alternator, go to step three. Otherwise, proceed to the next step.
Step 2 B: Remove the back of the alternator case. Usually, there are three bolts and maybe a couple of smaller screws that hold the case together. You may also need to remove plugs or other external components.
The trick will be to work slowly and methodically. Lift on the back of the case. If it doesn’t come off easily, look for whatever is holding it on. Make sure to keep all the parts together.
Step 3: Remove the voltage regulator. Usually, they are held on with 4 screws, and they should slide out easily once the fasteners are removed.
Putting It All Back Together
Once you install the new voltage regulator, you have to re-assemble the entire alternator assembly and re-route the serpentine belt. For the most part, simply follow the steps in reverse.
There is one big exception, though. When a steel bolt is going into an aluminum part, like the alternator bracket bolt going into the aluminum head of your engine, you should look up the torque specifications and use a torque wrench to tighten the bolt.
Replacing the Alternator
There are scenarios where it makes more sense to replace the alternator entirely than simply replacing the voltage regulator. First, if you have a very expensive voltage regulator, you’ll save a lot of time without paying much extra if you just replace the alternator. A GM voltage regulator can be about $40. This inexpensive replacement alternator isn’t much more. You’ll have to decide if it’s worth spending an extra $40 to save a lot of time.
Second, if you have an older vehicle or have a lot of extra electronics, it’s a good chance to upgrade your alternator. High-output alternators, like this one for GM trucks, don’t cost much more than standard alternators.
Paying a Shop
If you don’t have the time or tools to replace the regulator yourself, you can expect to have to pay between $100 and $300 depending on your car’s make and model. The regulator itself is fairly cheap. They are usually about $20, except for some exceptions for rare or high-performance cars.
Paying the hourly rate of the shop is what can make the procedure expensive. Hourly rates tend to be between $75-150, and if you are unlucky, this procedure can take three hours.
Power to the People
Your alternator is important. It keeps your engine running, and perhaps more importantly, it keeps your phone charged. If you can’t get the voltage you need, your morning commute will be a whole lot worse. Solve the problem by swapping in a new voltage regulator.