Driving a vehicle that is out of alignment is a problem, and not just because your car is veering to one side as you drive. Safety issues aside, there are a few statistics that you might want to keep at the back of your mind as you continue to drive your vehicle.
According to Tire Business, you might as well drag your tire sideways at 100 feet per mile for every inch that your vehicle is out of alignment. Additionally, the U.S. Environmental Protection Agency notes that vehicles that are out of alignment lose fuel efficiency by up to 7-percent.
Wait, there’s more.
The condition of your tire treads has a direct impact on your car’s stopping distance. Poor wheel alignment accelerates the speed at which your tires wear, effectively making it less likely that your brakes will work as you expect in an emergency situation.
Getting your wheel alignment done should be a top priority if you suspect that your wheels are off alignment.
- When to Do a Front-End Alignment
- Is Front-End Alignment the Same as Wheel Alignment?
- What You’ll Need for a Front-End Alignment
- How to Do Front-End Alignment Step-By-Step
- 1. Prepare for alignment
- 2. Check for damaged parts
- 3. Place pieces of cardboard under your front tires
- 4. Loosen the tie rod locking nut
- 5. Straighten out the steering wheel
- 6. Tie the string length-wise from the front to the back of the vehicle
- 7. Adjust the string so it is parallel to the rear wheels
- 8. Measure the front-end toe
- 9. Adjust the tie rod
- 10. Rock the vehicle back and forth
- 11. Tighten the locking nut
- 12. Go for a test drive
When to Do a Front-End Alignment
Experts suggest that you should get your car’s alignment checked every 10,000 miles or every 12 months, whichever comes first. Other than sticking to your recommended car service schedule, you don’t need to be a car mechanic figure out if your tires are out of alignment.
Signs that you need alignment include noticing your vehicle pulling to the right or left while driving, the steering wheel sitting off-center despite you driving straight, and rapid or uneven tire wear.
Is Front-End Alignment the Same as Wheel Alignment?
Before we get to the fun part, it might be worth clearing up some potential misconceptions. This article deals specifically with front-end alignment. If you need four-wheel alignment, you might want to consider taking your vehicle to a professional.
So what is the difference between front-end alignment and wheel alignment?
The difference here is subtle but still important. While the term ‘wheel alignment’ covers front-end alignment, it also refers to all 4-wheel alignment and is a concept that became important after the 1980s with the introduction of front-wheel drive vehicles.
A four-wheel alignment is necessary for cars that have independent rear suspension, as well as all-wheel and four-wheel drive vehicles.
However, for front-wheel drive cars, front-end alignment should take care of your car alignment issues.
What You’ll Need for a Front-End Alignment
The encouraging news is that you won’t need any of the specialized machines or equipment that you would typically find at an auto shop.
Here is what you’ll need to do your front-end alignment:
- Tire jack
- 4 jack stands or similar objects
- Adjustable wrench
- Tape measure
- A large ball of string
- 4 pieces of cardboard
- Vehicle’s service manual
- At least 10 feet of space
- Flat, level ground
- A friend
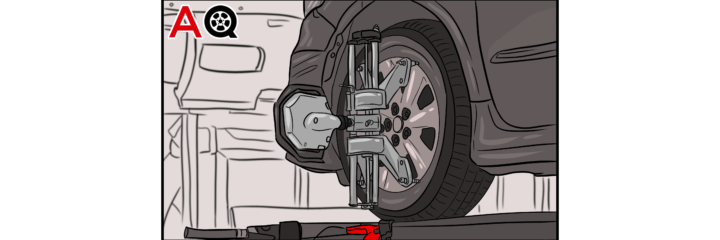
How to Do Front-End Alignment Step-By-Step
1. Prepare for alignment
Park your car on a flat, level surface. Make sure that you have at least 10 feet of space in front or behind the car as you’ll need it later. Check that the tire pressure is even in all 4 tires. Uneven tire pressure can cause alignment issues.
Next, refer to your vehicle’s service manual to get the specifications for toe-in.
Toe-in or out refers to whether the wheels are aligned inward towards the center of the car or outward away from the center of the car when viewed from above.
2. Check for damaged parts
Jack up the car so that the wheel you are inspecting is slightly above the ground. Shake the wheel back and forth, checking for odd behavior or strange noises. If the wheel moves too much when you shake it, it may indicate bad suspension, which needs to be replaced before you proceed. Bad suspension can also cause wheel alignment problems.
Also, listen for any rattling. Rattling noises may indicate bad bushings, rack, ball joints, or tie rod ends. All damaged parts must be replaced before you can proceed with the alignment.
3. Place pieces of cardboard under your front tires
Stack two pieces of cardboard and place them just behind the front wheel. Repeat the same on the other side.
Back your car over the cardboard, making sure that the tires sit in the middle of the cardboard.
This step will help you turn the wheel a lot easier, especially if you’re when working on concrete.
4. Loosen the tie rod locking nut
Depending on the ground clearance you have for your car, get under the vehicle and locate the tie rod locking nut. This nut is typically located at the inner end of the tie rod.
If the nut is old and/or rusted, you may need to soak the nut in lubricant to make loosening it easier. Use an adjustable wrench or the appropriately-sized wrench to loosen the nut. Repeat the process with the second front tire.
Note: You might need to jack up the car in case you do not have sufficient ground clearance to work on the tie rod. Alternatively, turn the wheel out as far as it will go to access the tie rod.
5. Straighten out the steering wheel
Get in the driver seat and straighten out the steering wheel. Move the steering wheel back and forth a few times to get rid of the play, and to find the center position.
6. Tie the string length-wise from the front to the back of the vehicle
Take your jack stands or other sturdy objects such as step ladders or milk crates (get creative if you don’t have jack stands), and place them at the front and back end of the vehicle facing each other.
Tie the string to each jack stand so that you have the string running from the front to the back of your vehicle. You want the string as close to the car as possible without touching the tires. Repeat this process on the other side of the car.
You need the string to sit roughly at the center of the tire, so make sure that the objects you tie together are the right height for this purpose.
7. Adjust the string so it is parallel to the rear wheels
Once you have your string running parallel from the front to the back of the car, and the string is running about half-way up the wheels, make your way to the rear of the car.
Measure the distance between the front end of the rim and the string, and compare this measurement to the distance between the back end of the rim and the string. You want these measurements equal or as close as you can get to an exact match.
Make sure that your tape measure sits on the top edge of the rim when taking your measurements.
Adjust your string accordingly until you have an equal measurement. Repeat the process on the other side of the car.
Keep in mind that you are only doing this step for the rear tires.
8. Measure the front-end toe
Make your way to the front tire.
Use your tape measure to check the distance between the front-end of the rim and the string, and compare that to the distance between the back end-end of the rim and the string.
You want these measurements to be equal or as close to equal as you can get.
Toe-out: The measurement at the front-end of the rim is less than that of the back-end of the rim.
Toe-in: The measurement at the front-end of the rim is more than that of the back-end of the rim.
9. Adjust the tie rod
How you go from here depends on whether you are toed-in or out.
If you are toed-out, that means that the wheel needs to be turned inward. To do this, you will need to turn the inner tie rod clockwise to tighten it.
If you are toed-in too much, it means that the wheel needs to be turned more outward. In this case, turn the tie rod counter-clockwise to loosen it.
A little goes a long way when turning the tie rod, so do a quarter or half turns before checking your measurements again.
Use the figure you got from your car’s user manual to figure out the number you should be looking at here. Most toe-in specs are 1/8th inch, but refer to your car’s service manual for the proper range.
Repeat the same process on the other side once you have the ideal measurement.
10. Rock the vehicle back and forth
Make sure that you rock the vehicle back and forth a few feet each time you adjust the tie rod. The idea here is to transfer any adjustments you have made to the tires.
This step is crucial for you to get accurate measurements. Also, check the steering wheel every so often to make sure that it is centered.
You may need a friend for this step.
11. Tighten the locking nut
Once you are happy with the alignment on your vehicle, be sure to tighten the tie rod locking nut on each side of your vehicle.
12. Go for a test drive
It is now time to appreciate your handy work! Take a test drive to see if you got the alignment right.
Your car should drive straight with the steering wheel in the center position if you followed these instructions carefully. Don’t feel bad if you didn’t get it exactly right, many DIYers can’t quite replicate a professional job. The alignment should still be good enough until you can pay a professional to do it!