We live in a very well-lit world. Our cars’ electrical systems illuminate the road for us so we can drive at night, make the dashboard shine so we can change the tunes in the dark, and signal our intentions to other drivers. It can be annoying or downright dangerous if they stop working.
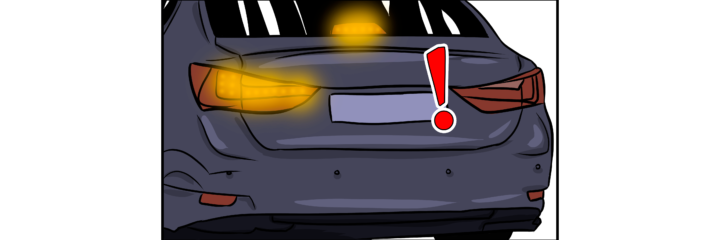
In this article, we’ll be taking a look at what to do if your rear exterior lights, or tail lights, stop working. First, we’ll go over an overview of what they are, then discuss the common issues and how to test for them. Finally, we’ll provide a quick diagnostic checklist for you to follow and solve the issue fast.
Types of Tail Lights
When people say tail light, they usually mean the red lights on the back of a vehicle that are only on if the headlights are on. They are for visibility and are distinct from the turn indicators or brake lights—however, most of the exterior lights on your car use the same technology. Even though we’ll be talking primarily about the rear visibility lights, you can use the guide for brake or reverse lights as well.
Exterior lightbulbs come in three primary variants. Each one has advantages and disadvantages. The important thing to note is that if you upgrade the tail lights, you should upgrade all the rear lights to the same type. That is usually not an issue since many cars have all the lights in one housing, and you can simply buy new housings that include the lights.
LED
LED tail lights are becoming standard on many new vehicles. The bulbs last much longer, and they can be much brighter while using less energy. The downside is that they tend to be more expensive than older halogen light bulbs, and they need special electronics to allow them to integrate with older systems. Thankfully, they’ve become cheaper in recent years.
OLED
OLEDs are simply the newest evolution of LED technology. They are brighter and more versatile than traditional LEDs, but they are very expensive. You are unlikely to find them on anything other than new luxury cars.
Halogen
Most car headlights are halogens. They are very inexpensive, require almost no additional electronics, and nearly universal in application. Almost every car manufactured between 1930 and 2010 came with halogens. It was only recently in car history that LEDs began taking over.
The biggest disadvantage to halogen lights is that they don’t last very long compared to LEDs, and they aren’t as bright as other technologies. It’s common to upgrade halogen headlights to other types, especially xenon. There usually isn’t much emphasis on making tail lights brighter, though, so most people will simply replace rather than upgrade broken tail lights unless they’re trying to modify the look of their car.
Xenon
HID, or xenon, lights are much brighter than halogen lights. They used to be the most common upgrade and could be found on high-performance cars from the factory. However, LEDs have fallen in price so much that xenons are becoming rarer over the last decade.
Xenons cost a lot, and they require special ballasts and housings. Unlike LEDs that you might be able to install into your factory housing with minimal work, an HID kit requires extra modification. They also have a lifespan that is similar to halogens, which is why LEDs are slowly taking over the HID market.
Common Issues
If your tail lights are not working, it’s probably for one of the following reasons.
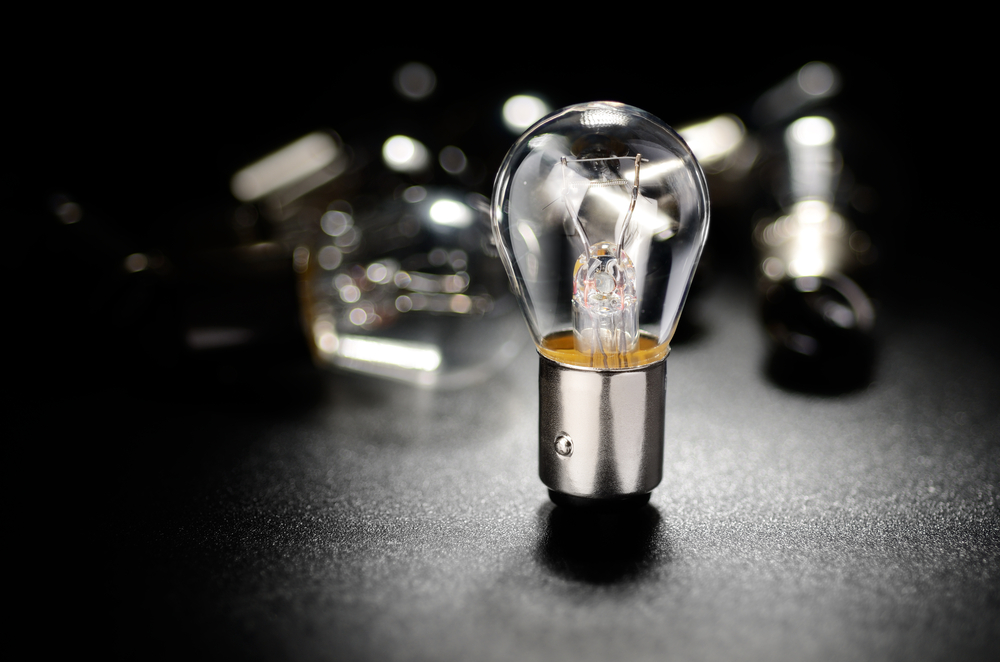
Burned Out Bulb
If you have halogen bulbs, this is the most likely reason that a light has failed. The bulbs only last so long before the filaments become weak and break. Broken filaments can’t produce light. However, LEDs don’t have filaments, and it’s very uncommon for them to burn out. If you have LEDs, your time would be better spent exploring other causes first.
The good news is that replacing a light bulb is usually very easy. You may need a screwdriver to remove the housing, but the actual bulb is usually only twist-locked in and can be removed by hand. Since the red color comes from the housing, a replacement bulb is usually white.
The easiest way to get a replacement is to simply take the burned-out bulb with you into a parts store and match it to a new one. Otherwise, just look up the group number and color on the internet. Amazon has a very good selection of halogen and LED upgrade bulbs like these ones for a Corolla.
Testing a Lightbulb
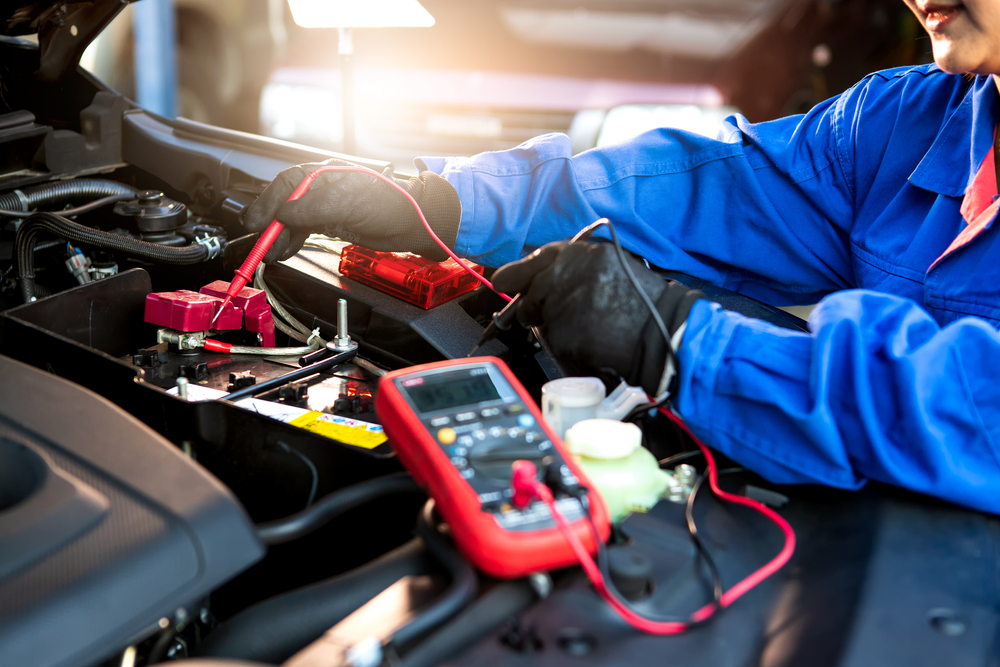
Halogen bulbs are very easy to test with a multimeter. You simply need to check for continuity between the positive and negative contacts. This video is a little slow, but the presenter walks you through almost every scenario that you will encounter.
Testing an LED can be a bit trickier since they can be complete circuits, effectively not showing any issues, and still fail to function. There are special tools for testing LEDs, like this one, but it’s very easy to build a homemade tester using some wire and a 9v battery.
Blown Fuse
A very common problem that causes lights to go out is a blown fuse. You’ll have to consult your manual to find out where the fuse for the lights is located, but once you have found it, they are very easy to test and replace.
Another issue may have caused the fuse to go bad, though. If that issue is not addressed, the replacement fuse will simply go bad again. Fuses are rated to a certain amperage, and electrical shorts can quickly cause them to exceed that amperage and blow. If you are routinely losing fuses, you need to check for shorts before they are a fire hazard. If it happens twice on the same fuse, reevaluate.
Testing a Fuse
It’s often easier to just replace the fuse and see if they work rather than testing the fuse. Most vehicles have spare fuses attached to the inside of the fuse box. If you want to test the old fuse, a fuse tester is very inexpensive if you don’t have a multimeter or test light handy.
Wiring Problems
Wires and connections can go bad and cause all sorts of problems. The easiest way to tell if you have a wiring or connection issue is that the lights will still come on occasionally. A blown bulb or fuse will never work, but a loose wire can occasionally make a connection.
Testing for Broken Wires
When you suspect a bad wire or connection, the first step is to simply visually inspect the connections. Critters can chew on wires if they take up residence in your car, and they will leave obvious signs. Other visual signs include corrosion, melted insulation, and carbon scoring, where a positive wire may have accidentally connected with the ground.
If you can’t find any signs of a broken connection, you need to use a multimeter or test light to test each wire. This can be a frustrating and time-consuming process, so get a friend that can help hold wires and bring drinks if you can. This video has a good tutorial on using a test light.
Bad Relay
We’ll talk more about relays and switches below, but a relay is another component that can wear out and fail. Often, the relays are located next to the fuses, so you’ll have to check your car’s manual to find out where the fuse box is located. Then use the reference numbers to find out which relay is responsible for the tail lights. The information will either be in the manual or printed inside the fuse box.
Testing a Relay
Unlike fuses and lightbulbs, relays can be very tricky to test. You can find more information about the process here. The easier method is simply swapping it with a similar relay and seeing if the lights come on. There aren’t very many types of relays used in automotive, so often, you can find the same type of relay near the one you suspect is broken.
Bad Switch
A bad switch is probably the least common issue, but it is something that can happen. When you turn your headlights on, or the automatic sensor turns your headlights on, you are activating a switch. If that switch is bad, it won’t trigger the relay, and the lights won’t come on.
These switches are often difficult to remove and test, so they will usually be tested after all other issues have been ruled out.
Testing a Switch
The basic way to test a switch is to test for continuity across the posts when the switch is in the on position. However, there are a lot of different switches on the market, and some cars may have multiple switches. It’s important to consult a full-service manual or to research your specific car online.
Diagnosing the Problem
There is a process you should follow to make finding out the issue easier. The only tools you need are a screwdriver set and a way of testing continuity. That can be a simple continuity tester made from a lightbulb and some wire, a test light, or a multimeter.
The Six Step Process
The following steps are arranged from easiest to hardest to complete and are meant to make the process as fast as possible. Once you find the issue, replace the faulty component, and you will be good to go.
- Locate and check the fuse.
- Locate and check the relay. It’s often located near the fuse.
- Remove the tail light housing and inspect the wires and connections.
- Remove the bulb and inspect it for damage.
- Test the bulb
- Begin troubleshooting the wires and switches
Talk to a Mechanic
If you have reached step five and the issue still isn’t solved, consider taking the car into a shop. A competent mechanic will be able to diagnose an electrical issue quickly. Also, they may have resources or knowledge that allows them to find problems that are vehicle specific.
Working your way through the electrical system is not a job that can be completed in an afternoon, especially if you have to remove switches from the steering column or dash. If you are short on time, a mechanic will be able to complete the task much faster. Unfortunately, you can expect to pay upwards of $500 or more to fix wiring issues because of the complexity. Thankfully, most fixes are simple.
The Path of Electricity
If you do want to diagnose wiring or switch issues yourself, it’s important to know how the light bulb is powered. That way, you can trace the path from battery to bulb and test all the components along the way. You will need a multimeter for this job, and it’s a good idea to have a full-service manual that includes ohm ratings.
- Battery: The positive battery terminal is connected to the fuse block. Each fuse is plugged into the fuse block on one side, with the other side plugged into individual circuits.
- Fuse: A fuse is a switch that is always on unless they blow (the filament inside literally blows apart and breaks the connection). A fuse will blow when it receives more amperage than it is rated for. Modern fuses are color-coded and will have their amperage printed on the top.
- Switch: The light switch is connected to the relay and a constant power source. When you flip the switch on, it sends a low amp signal to the relay.
- Relay: The relay is nothing but a switch that allows power through when voltage is applied. The low amperage power from the light switch closes the relay and allows higher amperage power to flow through.
- Negative Terminal: The battery is connected to the fuse block, powering the fuses, which power the relays. When the relay closes, it allows power to flow through the entire circuit, from the negative to the positive terminal.
- Socket: The light socket has two connections—one connection to the relay and one connection to the ground.
- Bulb: The light bulb itself is the connection between the positive and negative (ground). When the relay is closed, power flows from the ground to the battery uninterrupted through the bulb.
Finding an Issue
To diagnose an electrical issue, you must start at the source (the battery) and work your way to the load (the light bulb). This can be a very difficult process because there are hundreds of electrical wires and connections are in your car. Finding the correct wires to test can be difficult, especially if you don’t have a full shop manual to decode the harnesses and colors.
In general, you are looking for one of the following issues.
- A damaged part that is causing an open circuit. If power can’t make it from negative to positive, you have an open circuit, and it won’t work.
- An electrical short that is robbing power. A short is what happens when a positive wire touches the ground before it’s meant to. Shorts can cause large spikes in amperage, generate a lot of heat, and can cause components to fail.
- There’s not enough power at a certain point. A voltage drop occurs when a component is generating more resistance than it should. If the load is not getting enough voltage, then it will be weak or fail to work. LEDs are especially susceptible to voltage issues.
Stay Visible
Tail lights are a matter of safety, and when you are operating a vehicle, being safe is a priority. Hopefully, if you have a light out, you can use this guide to solve the problem fast. Don’t be afraid to just replace cheap components like a lightbulb or a fuse instead of testing them, and definitely don’t be afraid to pay a shop to diagnose electrical problems. The time you save will probably be worth more than the amount you pay them and the hassle of messlng with your car’s electrical system.